Showing posts with label DSP. Show all posts

Wednesday, October 29, 2014

Pretty Packages by Stampin' Up! Artisan Design Team

Good Morning My Stamping Friends, I hope you're doing well. Today I wanted to share a blog post from the Stampin' Up! website. It was written by Sarah Sagert who is one of the Stampin' Up! Artisan Design Team members for 2014-2015. Aren't these packages soooooo cute! You can get all the supplies (listed below) on my website 24/7 at Http:/www.StampinUp.com/ECWeb/default.aspx?dbwsdemoid=2016780

Enjoy,
Rose-Ellen
~~~~~~~

Pretty Packages

I love giving gifts in pretty packages! It is definitely one of my trademarks. I love to present a gift to someone and watch their face light up when they see how pretty the packaging is! It’s like another gift in and of itself.Christmas is the perfect time to create some pretty packages! I decided to go with a Whisper White, Very Vanilla, Basic Black, and Gold color combo. Yes—that’s right! Mix your whites and creams! You can achieve a layered look with your projects simply by using those two colors together.
SU Blog Post - Oct - Sarah Sagert_crb#1 Photo - Collection - Sarah Sagert
SU Blog Post - Oct - Sarah Sagert_crb#2 Photo - Takeout Box - Sarah Sagert
The Takeout Boxes are darling! They are the perfect size for a small gift or box of yummy treats. I used the White Filter Paper to create a belly band around the box. I scrunched it up and sewed it down the middle to keep it gathered. I added some interest to my star die cut by using the Eclectic Paper-Piercing Pack to outline a few stars within the shape. This is an easy way to add detail.
SU Blog Post - Oct - Sarah Sagert_crb#3 Photo - Gift Card Box - Sarah Sagert
I used the Gift Card Enclosure Pack to create a little box. This technique was demonstrated to us at convention. Simply brilliant!! You score at 1/2" from the original score line along three sides. Secure the flaps using Sticky Strip and add a belly band to help contain your goodies. I used the Festive Designer Kraft Paper Rolls for my belly band. I LOVE these paper rolls! The quality is excellent—much thicker than I thought they would be.
SU Blog Post - Oct - Sarah Sagert_crb#4 Photo -Gift Card Box Side - Sarah Sagert
SU Blog Post - Oct - Sarah Sagert_crb#5 Photo - Gift Card Envelope - Sarah Sagert
My last pretty package was created using the Gift Card Envelope & Trims Thinlits Die. This die creates the perfect little enclosure for a gift card. I used the Kraft Cardstock for my base and then I began creating a pretty belly band using the Typeset Specialty Designer Series Paper to keep it closed. The belly band simply slides on and off.
SU Blog Post - Oct - Sarah Sagert_crb#6 Photo - Gift Card Envelope Detail - Sarah Sagert
I love using the Kraft color as a base for my projects—especially for pretty packages!
Sarah Sagert
2014–2015 Artisan Design Team
Supply List:
Takeout Boxes (item # 135827)
White Filter Paper (item # 129393)
Eclectic Paper-Piercing Pack (item # 133778)
Gift Card Enclosure Pack (item # 136662)
Sticky Strip (item # 104294)
Festive Designer Kraft Paper Rolls (item # 135828)
Gift Card Envelope & Trims Thinlits Dies (item # 135854)
Kraft Cardstock (item # 133674)
Typeset Specialty Designer Series Paper (item # 133704)

Tuesday, August 6, 2013

Stampin' Up! #Convention2013 photo journal #BeTheDifference - Post #1

Hi there My Stamping Friends,

Are you overwhelmed with all the blog posts of what happened during the Stampin' Up! Convention 2013 in Salt Lake City, UT a few weeks ago? I hope not because I'm just starting to post mine on my blog. If you follow me on my facebook page (Stampin' Up! with Rose-Ellen) or on Twitter ( @REEastman) or on Instagram (MyStampingFriends) you might have already seen some of these photos or heard some of this news as it happened, but here is a pretty comprehensive set of photos of some projects and lots of friends I ran into during the day.

I was hoping to write blog posts from the Stampin' Up! Convention, each evening when I got back to my hotel, but that just wasn't meant to be. We had so much fun from way before sun up until way after sunset and to be honest by the time I got back to my hotel I barely made it into my pajamas before I fell asleep. Well, except for that night when one of my roomies, Amber, and I got the giggles and of course when you try NOT to laugh, you just laugh harder. I'm so glad we didn't keep Stephanie and Michelle awake. They MUST have been exhausted to sleep through our giggling.

Anyway, enough about that.....here are some photo highlights from my trip to Salt Lake City, UT for #Convention2013 and #BeTheDifference

Stampin' Up! #Convention2013 #BeTheDifference in Salt Lake City, UT - I arrived earlier in the day and
was able to meet up with a friend that had a car so we went up to the mountians. Beleive it or not, this
was my first trip outside of Salt Lake City even though this is my 7th convention.

Stampin' Up! #Convention2013 #BeTheDifference in Salt Lake City, UT -
Aren't these mountains just gorgeous! Guardsman's Pass was beautiful

Stampin' Up! #Convention2013 #BeTheDifference in Salt Lake City, UT -
Here I am standing at the top of Guardsmans Pass. Its much steeper and much larger in person.
 
Stampin' Up! #Convention2013 #BeTheDifference in Salt Lake City, UT -
Riding the bus to the Riverton Home Office with Amber, Stephanie, Michelle,
Cris, Becky, Janna and about a hundred other people. Soooooo exciting!
 
Stampin' Up! #Convention2013 #BeTheDifference in Salt Lake City, UT -
Meeting Sandy Fleming and Stephanie DiGiovanni. They were in attendace at the Baltimore Regional
when I presented the Clear Block Stamping technique and Sandy made her
swaps based on that technique. They even asked for my autograph. Isn't that sweet!!

Stampin' Up! #Convention2013 #BeTheDifference in Salt Lake City, UT -
Two of my downline, Cris and Amber, visiting Stampin' Up! for the first time, at thier 1st Convention.
Can you say STAMPIN' UP! ROCKS!!!
 
Stampin' Up! #Convention2013 #BeTheDifference in Salt Lake City, UT -
Checking out the Stampin' Up! distribution center. You can even see the UPS truck being packed
as the boxes are filled, right in the center of the photo.

Stampin' Up! #Convention2013 #BeTheDifference in Salt Lake City, UT -
I ran into my Canadian Buddy Kristyne Brandt while we were on the tour of
the Stampin' Up! Riverton Campus.


Stampin' Up! #Convention2013 #BeTheDifference in Salt Lake City, UT -
Look who we ran into while touring the upper floor of the
Riverton Campus, our friend Tim.
This isn't my best 'selfie'.
 
 
Stampin' Up! #Convention2013 #BeTheDifference in Salt Lake City, UT -
Overlooking the atrium in the main lobby of the Stampin' Up! Riverton
Office. We're about to go into the Legacy Room. Check out how long the line is behind me.
Stampin' Up! #Convention2013 #BeTheDifference in Salt Lake City, UT -
One of the vignettes in the legacy room. I LOVE decorating tablescapes for fall and
this will be perfect for my table.

Stampin' Up! #Convention2013 #BeTheDifference in Salt Lake City, UT -
We finally stalked  tracked down ran into, yeah, ran into one of my favorite
Stampin' Up! friends, Shannon West. I'm so glad we got this photo because we
didn't get close enough for the entire rest of the trip.

Stampin' Up! #Convention2013 #BeTheDifference in Salt Lake City, UT -
Opening Session photo of me, Michelle and Stephanie BeingTheDifference

Stampin' Up! #Convention2013 #BeTheDifference in Salt Lake City, UT -
I'm so happy I got to run into my sweet friend Diana Gibbs. ...especially since
I was able to steal a moment to catch up before she started feeling not so great and had to leave.
I hope you're feeling all better by now my friend.

Stampin' Up! #Convention2013 #BeTheDifference in Salt Lake City, UT -
Not a great photo but I still had to snap one with the greatest cameraman Tom. He knows
his stuff and is so patient when working with newbie presenters (like me at the Baltimore Regional)

Stampin' Up! #Convention2013 #BeTheDifference in Salt Lake City, UT -
Another one of my favorite Stampin' Up! friends, Brian Pilling, that I was stalking
searching for ran into....yes, I'm going to stick with 'ran into'.

Stampin' Up! #Convention2013 #BeTheDifference in Salt Lake City, UT -
Shelli Gardner brough out Ronald McDonald and when we heard Ronald speak of the incredible need
of these kids and their familes, there wasn't a dry eye in the house. For me, it took me right back
to when WE stayed in a Ronald McDonald house in Philadelphia when one of our daughters was sick.
 
Stampin' Up! #Convention2013 #BeTheDifference in Salt Lake City, UT -
We saw some projects demo'd on the main stage. This project uses the Tag a Bag gift bags
and accessory kit, and our Ronald McDonald House Charities stamp set called Tag It ,
#130303 clear or #130300 wood mount. Buy the stamp set and Stampin' Up! send $3 to #RMHC.


Stampin' Up! #Convention2013 #BeTheDifference in Salt Lake City, UT -
Here is another project we saw demo'd on the main stage. It is a pouch made with our Modern Medley DSP
accented in gold and embellished with our new Pansy Punch #130698 and Very Vintage Designer Buttons,
and personalized with the ABC-123 Sketch Alphabet & Numbers. Awesome idea right?

Stampin' Up! #Convention2013 #BeTheDifference in Salt Lake City, UT -
I got to visit the recognition room since I earned an award this year. It was so much fun to write in these
thought bubbles and get our photos taken. I wanted to share this one to let you know how much
I HEART MYSTAMPINGFRIENDS !

Stampin' Up! #Convention2013 #BeTheDifference in Salt Lake City, UT -
Catching up with my friends Stella and Selene and meeting a new friend Becca in
the recognition room.

Stampin' Up! #Convention2013 #BeTheDifference in Salt Lake City, UT -
Then we ran into my friend Robin 

Stampin' Up! #Convention2013 #BeTheDifference in Salt Lake City, UT -
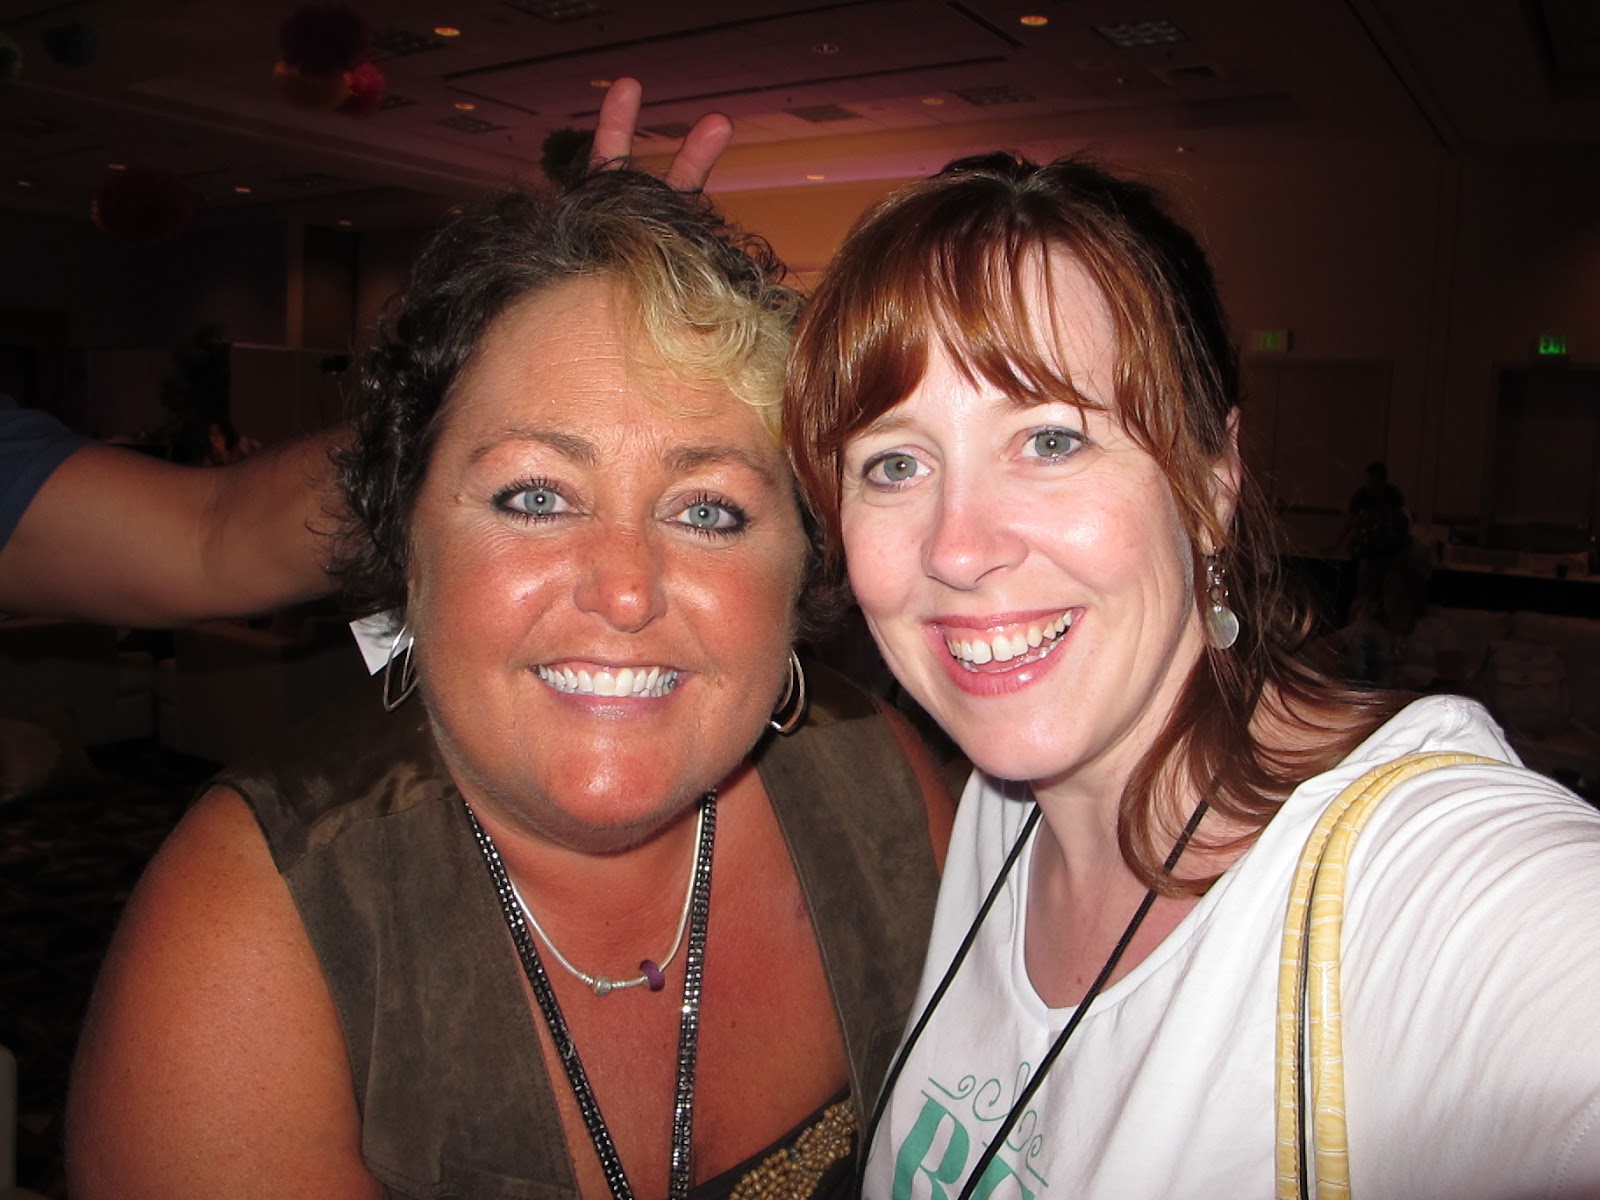
And I'm so happy I was able to see my friend Dawn Griffith. I'm sooo glad you were
able to make it with everything you've been through this year.
BTW, thats her hubby Richard giving her bunny ears.

Stampin' Up! #Convention2013 #BeTheDifference in Salt Lake City, UT -
Since Dawn's husband Richard gave her bunny ears we decided to try again but he's quicker than
 me and he jumped to the other side and gave them to ME this time. Too funny.

Stampin' Up! #Convention2013 #BeTheDifference in Salt Lake City, UT -
Here was a really fun surprise for me. My friend Selene can SING!! As a matter
of fact, this girls is on fire!! Thanks for sharing your gift Selene.

Stampin' Up! #Convention2013 #BeTheDifference in Salt Lake City, UT -
A beautiful display in the center of the room. 25 years worth of photo memories
from the beginning of Stampin' Up!

Stampin' Up! #Convention2013 #BeTheDifference in Salt Lake City, UT -
HAPPY 25TH ANNIVERSARY STAMPIN' UP!
Thanks for throwing such a great event and for sharing what you love with us!

I hope you enjoyed my first #Convention2013 post. I've got a few more coming but these photos are taking so long for some reason. I guess its time to take some of my photo collection OFF my laptop, right,

If you aren't a demo and you want to join in the festivities next year, I'd love to have you join my team and join us for a wonderful time at the next regional or convention. Just let me know and if you're local come to one of my team meetings and see what Stampin' Up! is all about.

Have a wonderful stamping day,
Rose-Ellen


Monday, December 17, 2012

Gift Card Holders using Scentsational Seasons, Watercolor Winter and Jolly Bingo Bits from Stampin' Up!

Well, I was on a roll with my personal blog challenge of posting every weekday in December but that all went kaflooey when one of my little lassies got a tummy bug for TWO FULL DAYS which brought us to the pediatricians and then to the ER. Poor girl was so sick. She is all better now but everyday life seemed to take over (meaning: making things to sell at craft fairs, showing all my Hispanic friends at the Hispanic Chamber of Commerce Holiday Party how to stamp with all our wonderful Stampin' Up! products - photos of that coming soon - a belated anniversary celebration of sharing a delicious dinner and theatre tickets with my in-laws, my oldest daughter's school band concert, Holiday parties and oh yeah, several days of NO EMAIL since I use cox.net and their whole system across the US was down! Whew thats a lot of stuff. ) . Soooo, my challenge has changed a little bit but the end result will still be the same for you. Instead of posting every weekday in December, I'm going to post 21 times this month (which equals out to one post every weekday in December). This means that I'll be posting more than once a day so come visit often and you'll see lots of Christmas stuff that I've been working on.

One thing I worked on this week was fulfilling some orders I received at a craft show. I made gift tags, candy holders and gift card holders. The gift card holders were so much fun. I made lots of different kinds as you can see. I used Scentsational Seasons, Watercolor Winter and Jolly Bingo Bits from Stampin' Up! for the gift card holders pictured here.
 
Gift Card holders using Scentsational Seasons, Watercolor Winter
and Jolly Bingo Bits from Stampin' Up!

I even made my own designer series cardstock. I needed the thickness of the cardstock but wanted the look of Designer Series Paper so I just went ahead and made my own. Sooooo much fun. You can do 'random stamping' like I did on the Christmas Tree or pointsettia cardstock, or you can so a specific pattern like I did on the candy cane, gingerbread man and hot cocoa cardstock.  So, which one is your favorite? Oh, if you're trying to copy mine exactly, keep in mind that in this photo my cardstock is already cut to the size I needed for this project.

Designer Series Cardstock handmade using Scentsational Seasons,
and Watercolor Winter from Stampin' Up!

Here is a photo of the inside of the project. I attached a folded envelope (which created two pockets) to the inside of my hand stamped designer series cardstock. In the pockets I placed two little decorated blank cards where you could write a note and attach a gift card. I finished it off with a belly band to keep everything inside.
Inside view of the Gift Card holders using
Watercolor Winter from Stampin' Up!
These alwasy get a great reaction for the person that receives them. Hope you enjoy.

Rose-Ellen

Monday, May 7, 2012

Betsy's Blossoms and Itty Bitty Banners by Stampin' Up!

I was so, so, so stinkin' excited to get my box of sneak peek goodies that I ordered from Stampin' Up! this week (an awesome benefit of being a demonstrator is that we get to order products one month before they are available to the public).I wish I could show you photos of all the products in my box of goodies, but at this point, I'm only allowed to show projects, not products.

I finally got a few minutes to stamp and play around for a bit on Sunday and here is what I came up with.

I had several frames that I picked up at a craft store years ago, sitting on my desk (honestly, they were waiting to go in the donation box) and as soon as I saw this wonderfully colorful Designer Series Paper from from the Floral District pack, I knew I had to alter the frame. I cut the

Monday, August 8, 2011

One FREE Stampin' Up Designer Series Paper pack for every three you purchase

Hi there My Stampin' Up! Friends, I'm here to tell you that the Stampin' Up! August Promotion is AMAZING!! Until the end of August, get a FREE package of Designer Series Paper when you buy three! You should consider using this limited-time offer to stock up on all your favorites, including brand-new designs from the Stampin' Up! 2011-2012 Idea Book & Catalog. That's what I'm going to do.

Think about which projects you'll be doing over the next 9-12 months and buy now, while we are having such a fantastic promotion. I know that I'll be using the Frightful Sight (#122351) for my girls' Halloween projects and gifts for their teachers and classmates. Who can pass us the Letters to Santa DSP (#122349) for their holiday cards and projects? I love the colors of the Berry Blossoms paper (#122350) so I'll have to get some of that and I KNOW that Just Add Cake (#124339) will be perfect for birthday cards that my girls are sure to make for their friends at school this year. And that's just for my girls. I haven't even mentioned all the scrapbooking, cardmaking and 3D gifts that I'll be working on, especially now that I have my hands on the new Stampin' Up! Simply Scored Scoring Tool and the Holiday Stocking and Stocking Accents dies for the Big Shot. I'm sure I'll be purchasing multiple packs of each so I'll probably get at least 3 free packs of paper!! And don't forget about the DSP Nautical Expedition (122343) in the Summer Mini Catalog ~ that isn't going to be available after August 31st so if you like it, stock up now!

Do you have friends that scrapbook or create cards or are papercrafters? Share a link to this blog post with them, share it on your facebook page, or save a copy of the flyer below (right click and save as) and e-mail it out to your friends. You never know who is looking for this for themselves or who is looking to get a gift for someone else and needs a good idea.

And to get your creative juices flowing, here are some photos from the samples at convention, showing lots of ideas for your Designer Series Paper projects. I don't know who made these projects since they were on display. If I knew for sure, I would happily give credit where credit is due.

Enjoy and have a wonderful day,
Rose-Ellen


Wednesday, June 30, 2010

New products in use in my studio.....

Hi there My Stamping Friends, I'm still here and full of creative inspiration. I had a little time yesterday while my little birthday princess napped so I had time to create a card for a very special friend. I don't want to say anymore or she won't be surprised when she gets the card in the mail. Here is my creation.


I used products and supplies from the brand new 2010-2011 Idea Book and Catalog. I used the Level 1 Hostess set Because I Care and stamped on the new DSP Newsprint using versamark and heat embossed it with black embossing powder. I colored the flower with the Pear Pizzazz and the Blushing Bride ink using an aqua painter. I sponged the Newsprint DSP with Pear Pizzazz and attached it to a Basic Black layer. I made a 'ribbon' using the in-color Blushing Bride cardstock, the eyelet border punch and the crimper. Finally I attached it to the Pear Pizzazz base to finish it off.

Hope you enjoy it,

Rose-Ellen

Sunday, April 18, 2010

Happy Retirement

Good Morning My Stamping Friends,

I want to start by saying a BIG thank you to everyone that was able to make it to the Relay for Life Crop this weekend. This is a cause that is near and dear to my heart and it was so nice to get together with all the scrapbookers and card makers for a such a wonderful event. Everyone seemed to have a great time (I know I did) and lots of people were asking when the next one will be held. I'm looking at putting together another crop in month or two. I'll keep you posted once a date is finalized.

While everyone was busy working on thier scrapbooks and cards I worked on a card for a swap that I'm participating in. For this swap I made 24 cardfronts using products from our upcoming mini catalog (ordering from that will start on May 1st). I'll get back 24 different cardfront and can show you lots of samples of how to use products from the new catalog. This is my submission.

And here is a close up of my card.

The card base is old olive. For the larger petals on the flower I used pumpkin pie, rose red and so saffron card stock and my Big Shot with the new Bigz die called Island Floral. The tempting turquoise flower was made with the Extra Large Flower Punch. I used my 5 petal punch for the smallest pumpkin pie flower. I think the rhinestone brad in the center of the flower pulls it all together. Plus I used our new Vanilla Shimmer Smooch Spray on the flower for an added shine. The designer series paper is called Island Oasis (and is full of fantastic colors and patterns). The Stamp set I used for the background is called Tropical Party and will be available in clear mount and wood mount. The sentiment is from my current favorite go-to sentiment set Teeny Tiny Wishes. I used 'Happy Retirement' because it would be a dream to retire somewhere as beautiful as Hawaii.

I'm expectng my package of cards to arrive in about 10 days so stay tuned to check out the different I'll be posting.

Until then,

Happy Stamping