Showing posts with label Full Heart punch. Show all posts

Tuesday, April 19, 2011

Wedding Cards using the Sizzix Big Shot and Stampin' Up embossing folders

Hi there My Stamping Friends,  Today I'm going to share two Stampin' Up! wedding cards that I made for two friends who found out they were attending the same wedding last weekend.

The first idea came pretty easily as I have seen similiar cards swapped at lots of Stampin' Up! events that I've attended and I've seen similiar cards posted on Stampin' Connection (which is a Stampin' Up! demo-only  web forum ~ let me know if you want to join my Stampin' Up! team and we can chat about how you can get access to Stampin' Connection and so much more!). My card was inspired by a fellow Stampin' Up! demo, Stephanie Sullivan. I just changed it up a bit to fit my/the betrothed's needs.

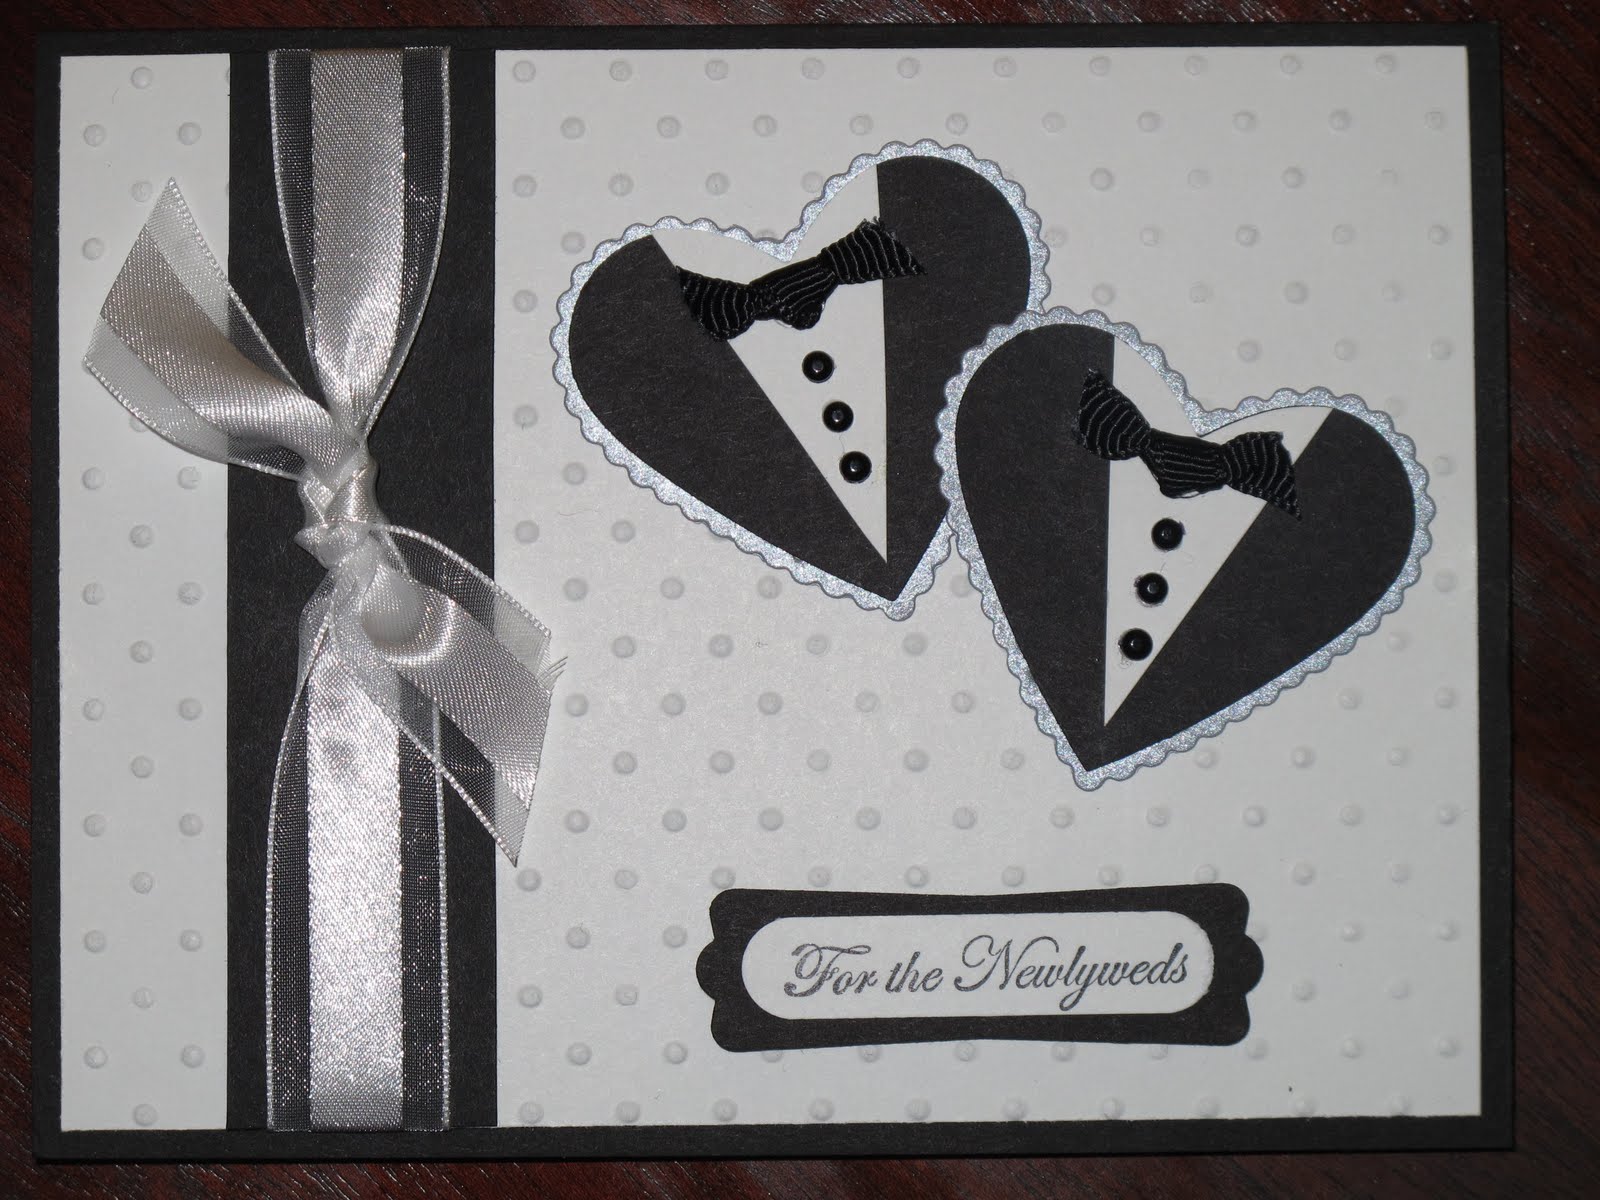
For this card I used basic black and whisper white cardstock for the base and layer. I used the full heart punch for the tuxedos, the Big Shot with the perfect polka dots embossing folder for the background, the modern label punch and the word window punch and Teeny Tiny Wishes for the sentiment. I made the tuxedos stand out by using a layer of brushed silver cardstock that I ran through the Big Shot with the Scalloped Heart of Hearts embosslit die. Too cute! The left side is finished off with some 5/8th inch whisper white organza ribbon.

The second card was sooooo much fun to make. I had an idea that I was going to make a wedding cake card and when I ran that idea by my friend Michelle (who was attending the wedding) she mentioned that the friend getting married was actually a professional cake maker (I guess we both are now, tee hee hee). When the stars align like that you just can't go wrong. So here is the card that I made for her to give the newlyweds. 


For this card I used the Big Shot with the Petals-A-Plenty , Perfect Polka Dots, and Elegant Bouquet embossing folders to make the cake layers. I used the Scallop Trim Border punch for the red decorative icing, the small heart punch for the decorations on each layer and for the tuxedos. I used Teeny Tiny Wishes for the sentiment and the Sweetheart stamp set for the arch on the cake and as a design on the envelope.

To the Newlyweds: T & M, Congratulations on your wedding. I hope you have a long, wonderful, joyous life together and I hope all your dreams come true!

For all My Stamping Friends: I hope you all enjoyed the cards and find some of your own inspiration in them. Feel free to contact me if you have any questions about the cards.

Rose-Ellen

Sunday, January 23, 2011

I LOVE LOVE LOVE the Stampin' Up! Petal Cone Die for the BigShot

Hi there My Stamping Friends, I can't believe its been a week since I last posted. I was in Nashville, TN for the Stampin' Up! Leadership Conference and our few days were jam-packed with things to do from 7:30am until 10pm. I had a fabulous time, as always, and will tell you all about that in some of my upcoming posts.

Today's post is going to be about Stampin' Up!'s Petal Cone die for the Big Shot. I can't tell you how much I LOVE this die. I was planning on demonstrating this die at my friend Robin Merriman's team meeting on Saturday so I sat down to play with it on Friday in order to have some samples to pass around (Thanks for having me demonstrate Robin, it was a blast!!). The first thing I was planning on making was a carrot (I was sitting with my friend Selene at Leadership during the petal cone presentation and noticed that it looked just like a carrot-can't wait till Easter now) but before I made a carrot (which I ended up not even doing) I searched the internet to see what some amazingly talented stampers did with this die. Then once I had all these ideas/options in my head I sat down to see what I could do. So, here is one large thank you to everyone that posts thier creative ideas on the web. I hope someone gets inspired by what I post as well. Enjoy!

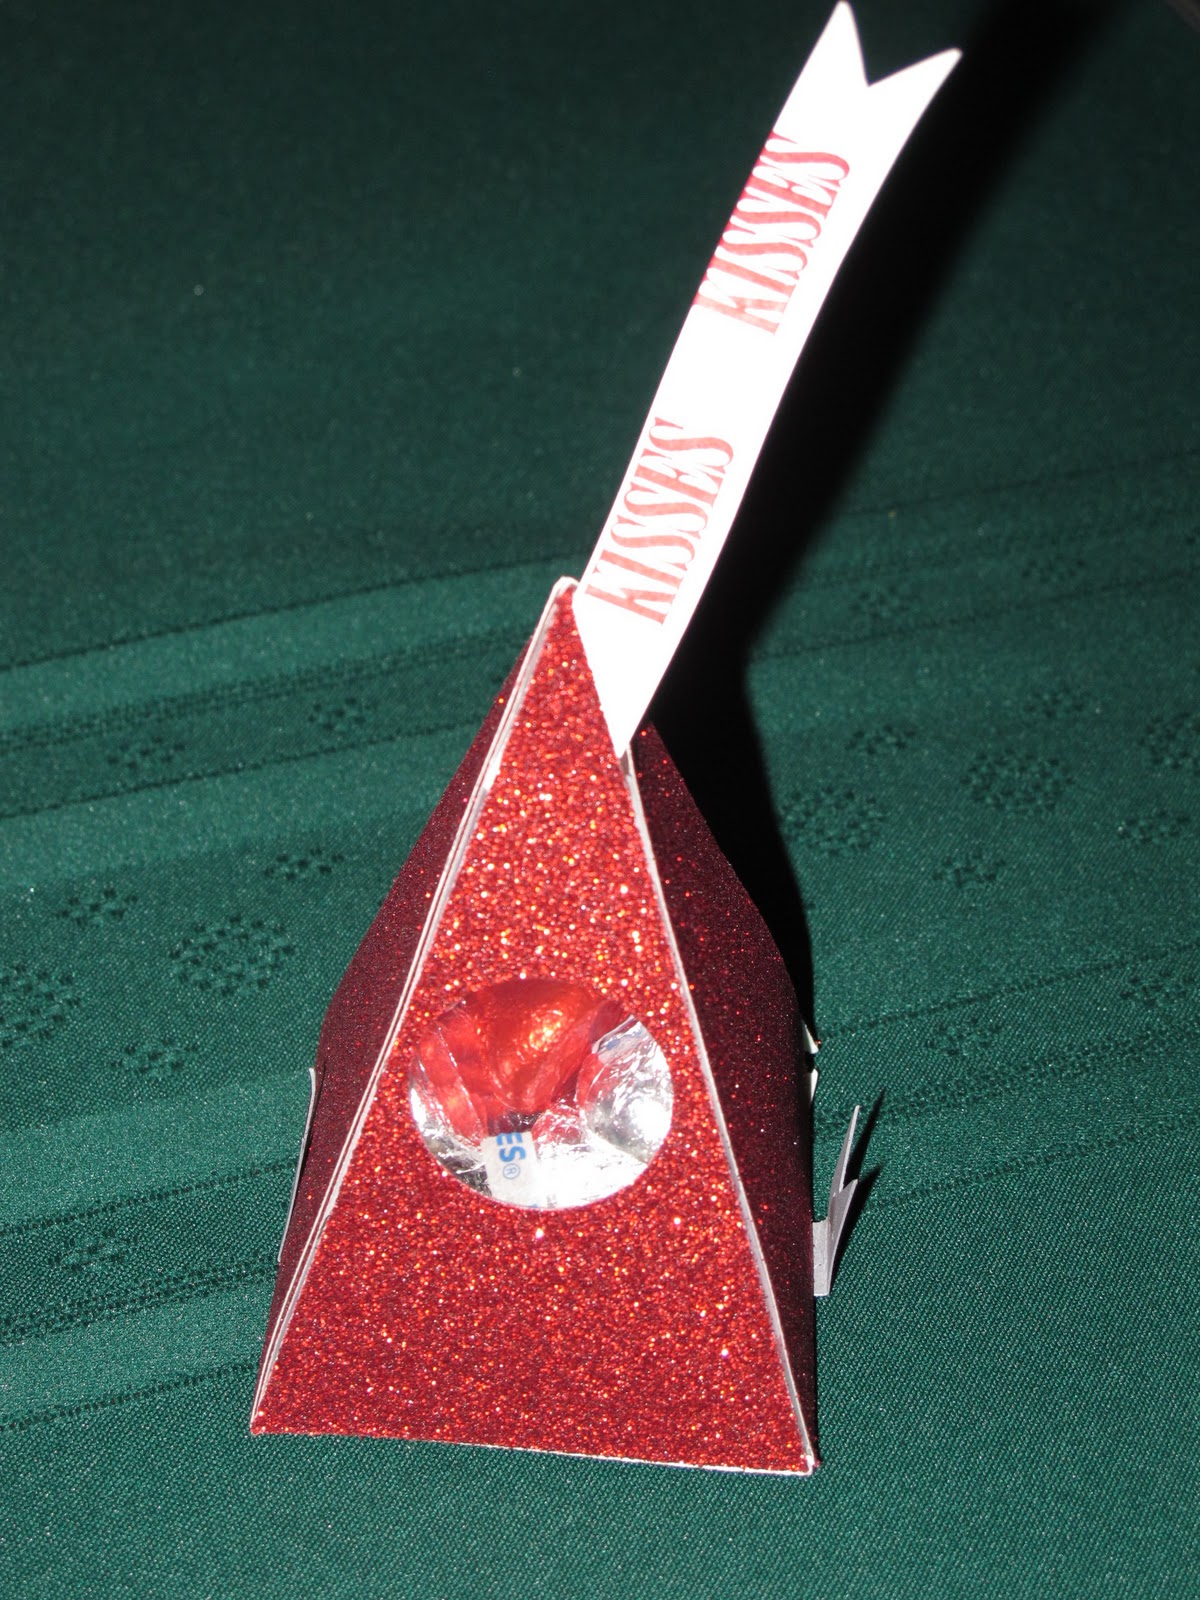
This is my version of what we saw presented at General Session during Leadership 2011. I used the new Glitter Paper and added the Kisses Tag to make it look like a Hershey Kiss. If we had silver glitter paper you KNOW I would have used that.

Here are wo different candy dishes made with DSP. They were so simple to make and can be made to coordinate with any party decor! Love it!


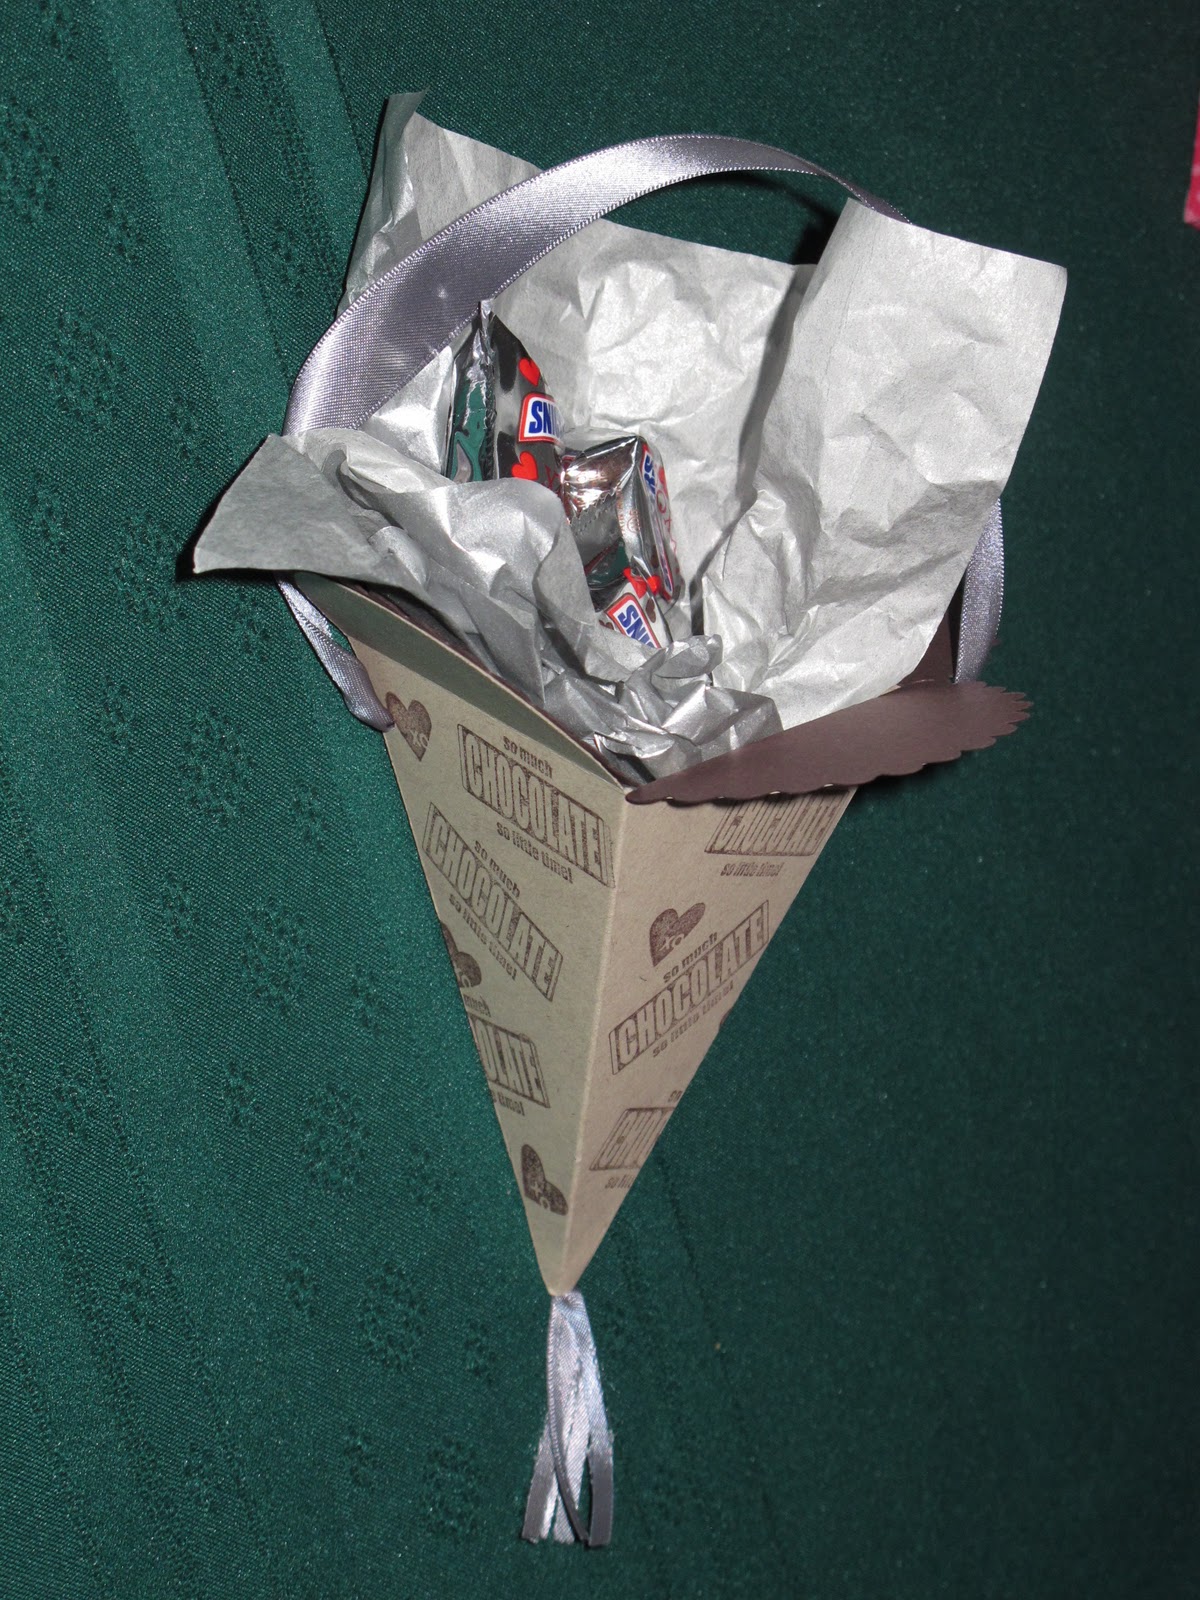
Here is a traditional cone made with Crumb Cake and Chocolate Chip cardstock and stamped with the Eat Chocolate stamp set.


This traditional cone was made with DSP. I used the XOXO stamp set to decorate the tissue paper to coordiante with the theme. Since I stamped Hugs and Kisses, I filled it withe Hershey's Hugs and Kisses.


This is just an idea for an ice cream cone shape that can be used as a birthday party or ice cream party invitation or thank you note.


This is what the inside of the ice cream note looks like. Let me know if you want more detilas or more photos. It was really easy to put together.

This next one is my favorite and was a hit at Robin's team meeting. I cut the petal cone and attached it together in the back. I cut the tab off the front side and used it as a card that opens in the center. The problem was that I couldn't get the card to stay 'closed' soooooo....I used the full heart punch to punch out two hearts. I attached one to the left front side of the card and the attached the other heart to the inside of the card leaving a little slot for the right side of the card to slide into (did that make sense?).


Here is a photo of the Basic Gray heart closure in case I didn't explain that well enough.  


Here is a photo of the inside. I spritzed it with 3 different colors in homage to Shelli Gardner, the owner and co-founder of Stampin' Up! She loves the vintage look.


I hope you enjoyed the samples I made (I love to read the comments you leave so feel free). I had a ton of fun making them. Tomorrow I'll post about some of the fun things we did at Leadership2011 in Nashville last week.

Rose-Ellen

Monday, November 29, 2010

One more Thanksgiving project

Hello there My Stamping Friends,

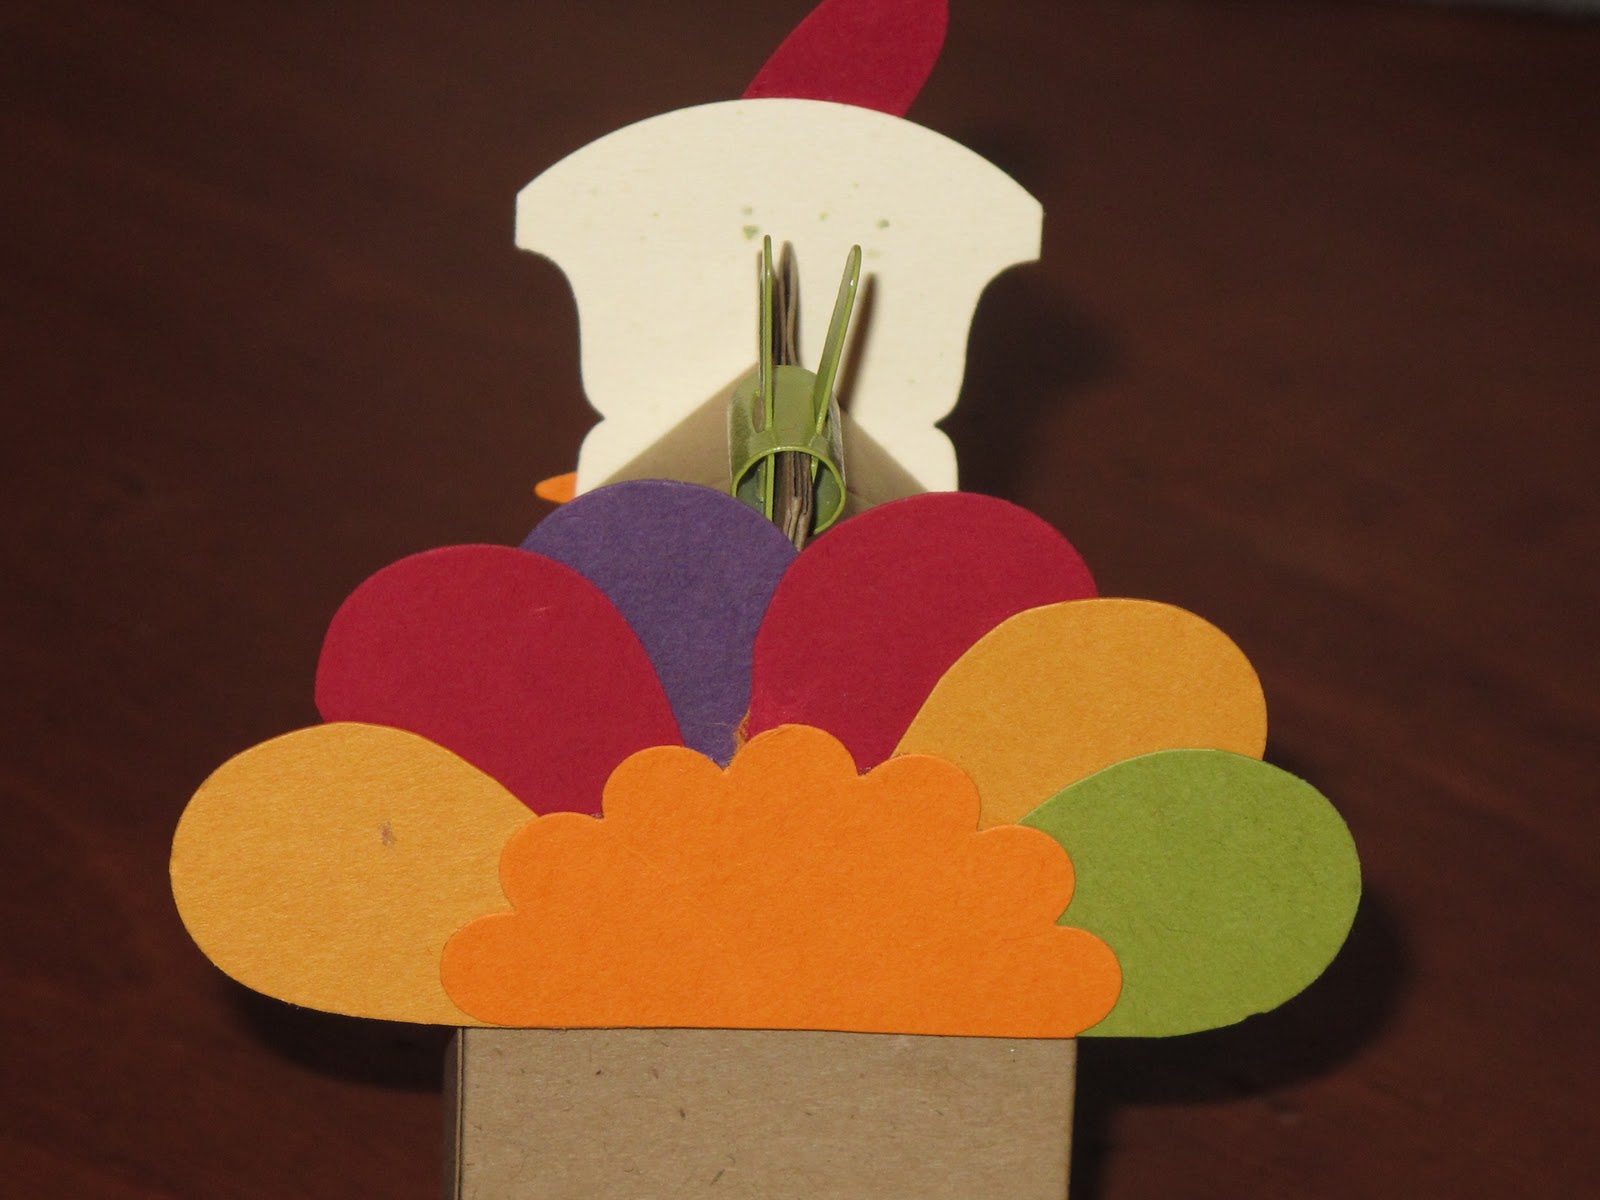
I wanted to get one more Thanksgiving project posted before December arrives. Last week, one of my very talented and creative stampin' friends, Donna, showed up to hostess her club meeting with a little gift for everyone in attendance. This little guy is so cute and I had to copy him. Donna spent a lot of time freehand drawing each of the heads and cutting out each piece for the face. She made the body with the Milk Carton die and the Big Shot (and you all know how much I LOVE my Big Shot). I believe she made the tail with some large heart punch. Here is her creation.


I had to CASE these turkeys for my Thanksgiving table and of course I only use Stampin' Up! products and I needed to make it easy so my girls could duplicate them, so here is what I came up with.


For my turkey I also used the Milk Carton die and the Big Shot. I used our Full Heart punch and the scallop circle punch for the tail. I used the Round Tab Punch for the head, a point of the star punch for his beak and the Heart to Heart for his waddle and ...hmm...thing that's on his head. For his eyes I used the Black Flourish Designer Jewels from the Holiday Mini Catalog (they aren't just for Halloween Projects!!). I used Teeny Tiny Wishes for the sentiment and used the word window and modern label punches along with dimensionals to show it off.

As always if you want to purchase the items you need to create a project like this you can visit my website at http://www.roseelleneastman.stampinup.net/ or call or e-mail.

Hope you enjoy the project and have a great day,
Rose-Ellen